DIY Farmhouse Table
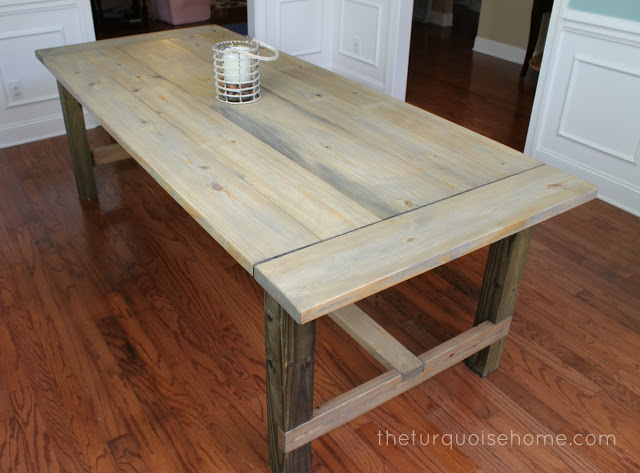
This large DIY Farmhouse Table seats 8+ and adds gorgeous rustic charm to your home for less than $100. Use the Kreg Jig tool to make this big project super easy!
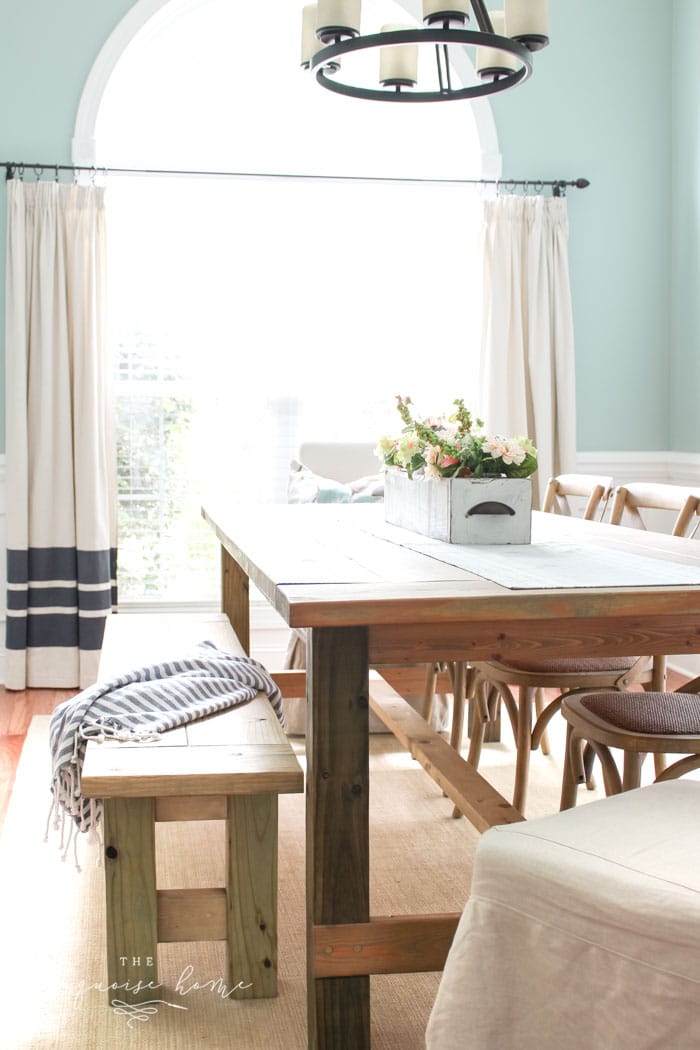
I am so excited to share my DIY farmhouse table with you! I absolutely love it. It was my first build with a Kreg Jig, and I’m super proud of how it turned out! While there are a few things I learned while making it (and might do differently), I’m so thrilled to finally have a dining room table!
I had been eyeing a beautiful, rustic trestle table, but the price tag of more than $1,000 just wasn’t in the budget. I just couldn’t fork over that kind of money right now with Christmas coming. And we’re going to be having my husband’s family over for Christmas this year. So, I needed a table!
This post contains affiliate links for your convenience. See my full disclosure policy here.
So, I found this awesome tutorial on Ana White’s blog, and convinced my husband that if I could buy a Kreg Jig then I would build us a farmhouse table for less than $100 dollars in supplies. He was totally on board. Love him!
By the way, that Kreg Jig purchase was one of the best decisions I ever made and it has paid for itself over and over again. If you do any building whatsoever, buy this tool. I cannot begin to tell you how awesome the Kreg Jig is! It’s so easy to use, and made building this table a breeze.
Almost every one of Ana’s plans uses a Kreg Jig, so if it calls for it, buy it. You will love it – I promise! I even wrote a post about the 10 projects to build with a Kreg Jig. (And that’s just the tip of the iceberg!)
RELATED: How to Build a Farmhouse Bench
Tools Needed to Build a DIY Farmhouse Table
- Drill
- Kreg Jig
- Circular saw
- Miter saw (optional, but I love mine for easily getting straight cuts!)
- Orbital sheet sander
- Drill bit set
- Tape measure
- Level
- Speed square
- Pencil
- Safety glasses
Supplies Needed to Build a DIY Farmhouse Table
Enter Ana White. (Love her and her site!!) I had seen these plans on Ana-White.com in the past for her original DIY table, but it seemed like a ton of work. And then just last month she came out with new plans, much easier, using a Kreg Jig.
You’ll find all of the lumber supplies needed for Ana’s new Farmhouse Table (pocket-hole) plan HERE. I switched up a couple of things, so I’ll share my supply list below. But you can use her supply list, if you want a smaller table than mine.

If I had to do it all over again, I think I would have done a smaller table, but my big table works just fine and is perfect for a large crowd! It just takes up a whole lot of space when not in use. 🙂
- 4 – 2×4 @ 8 feet long (aprons and stretcher board)
- 1 – 4×4 @ 10 feet long (I used a treated 4×4 post, which kept the stain from adhering to the legs, but I don’t mind the color. Evidently it’s impossible to get an untreated 4×4 post.)
- 4 – 2×8 @ 8 feet long (These are the top table boards. Ana’s tutorial uses 6 foot boards, but I extended my table by 11 inches, so I used 8 foot boards.)
- 1 – 2×8 @ 8 feet long (breadboard ends)
- 1 – 2×12 @ 8 feet long (This is the middle board on the table top. Again, I used an 8-foot board instead of a 6-foot board because I extended the length by 11 inches. I also used a 2×12 instead of a 2×10 because I widened my table by 2 inches.)
- 3 inch wood screws
- 2-1/2″ Pocket Hole Screws
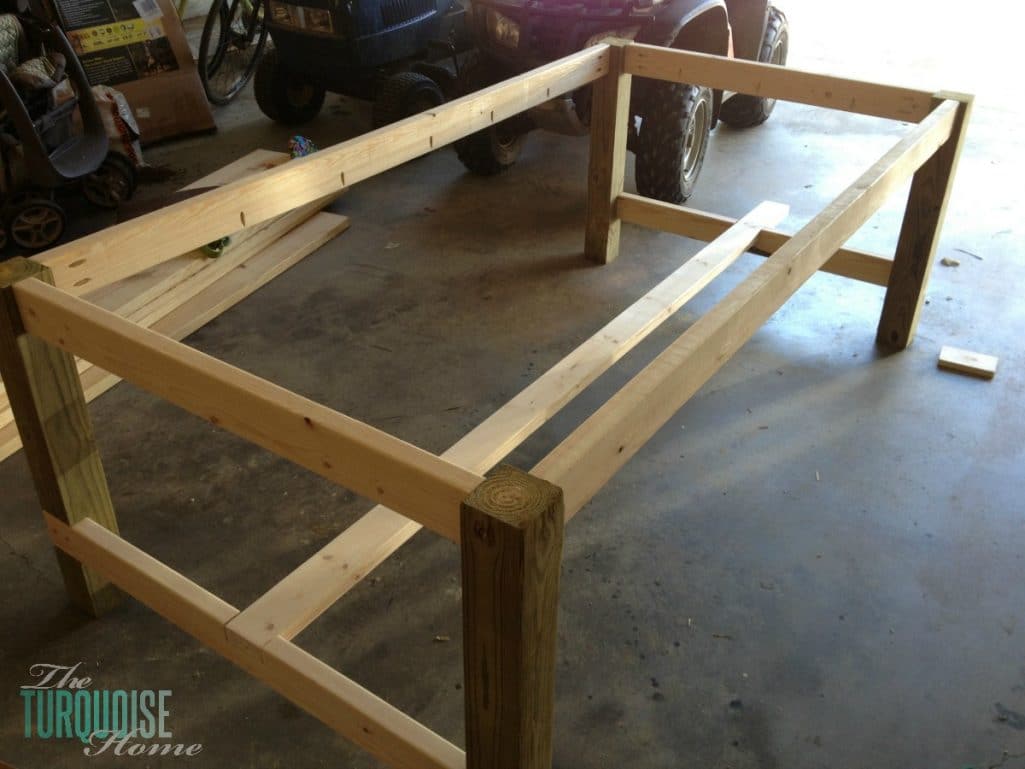
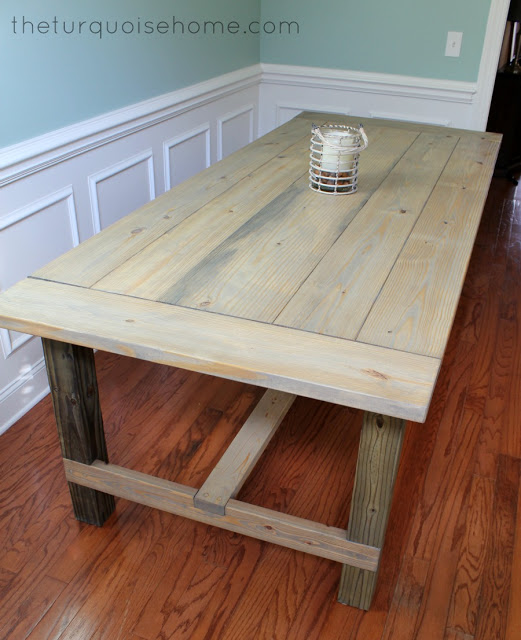
It was actually quite easy to build and took me about a week of nap times to construct. I adjusted a couple of things from Ana’s plans like I mentioned in the list: I lengthened the table by 11 inches and widened it by 2 inches.
Get the full plans for the table from Ana White’s site!
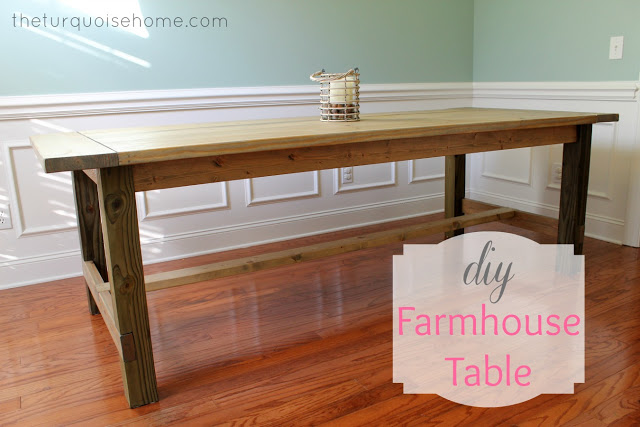
I used a stain that is new to the market: Minwax Weathered Oak. (You can see in the above picture where there are places where I didn’t sand the wood in the direction of the wood grain. And so there is some streaking. Always sand in the direction of the wood grain. Lesson learned!)
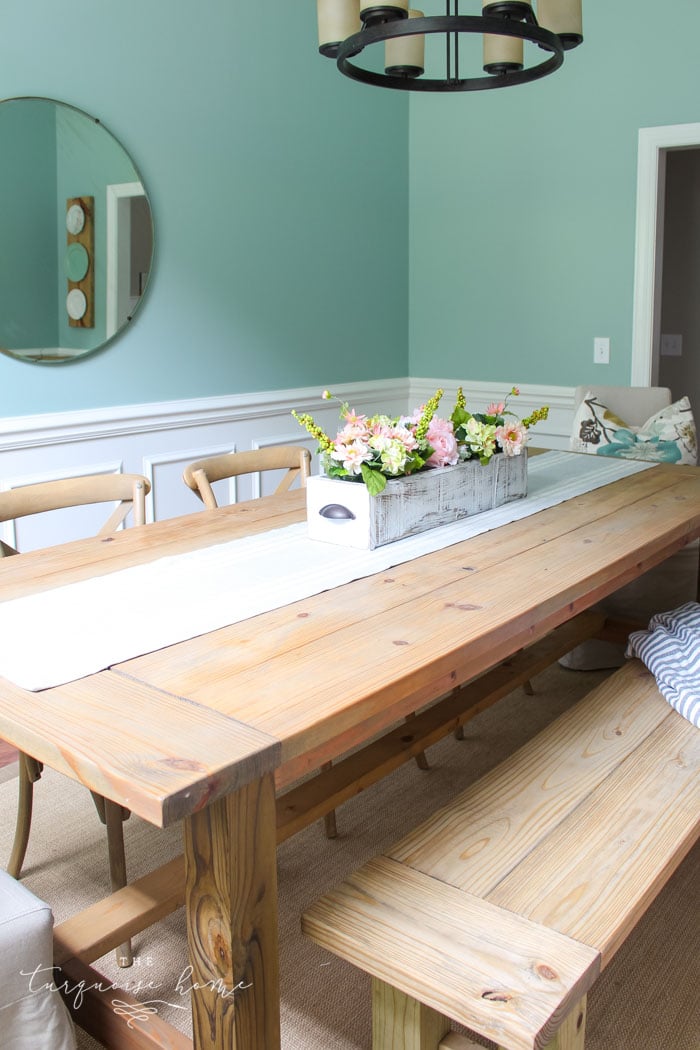
In the end, I’m so happy with my big, sturdy farmhouse table. I’ve already made it my desk in my dining room and I love it! I’ll clear it off later this month when we host Christmas dinner. But, when no one’s coming over, it’ll function as my large desk/table. I look forward to being able to spread out and even make crafts on it!
What do you think of my latest project? I surely do love it!
Previous photos from this post, before I learned how to take better pictures. 🙂


I’ve had this plan saved for a very long time and this year I’m going to attempt it. I do have a question about making the larger size. Did you build the same size base as Ana or did you make it larger as well? Thanks so much!
Kim
wooow great! The table is beautiful 🙂
Where can I find your instructions using your measurements?
I’ve been using those WoodPrix’s plans instructions since 3 years already. I made about 70 different stuffs. Almost everything was perfect. I had some problems only with 1 complicated wardrobe instruction but it wasn’t plans fault.I really enjoy plans from WoodPrix’s plans.
http://www.woodprix.com
First off… I love love love this table
My husband and I are going to try to build it.
Second… Did you build the bench? If so do you have directions on how to build it?
Hi Celia! Thank you! Yes, I did build the bench. You can find that here —>>> https://theturquoisehome.com/diy-farmhouse-bench/ I hope this helps!
Your table looks wonderful! I love the weathered oak stain. What did you use for your top coat? Do you have scratches and if so how do you deal with them?
Hi Beverly! Thank you! I used polyrethane for the top coat. We don’t have many scratches at all. And any that we do have just add to the character of it! I don’t know how to get the red permanent marker off that my 2-year-old put on it this year, though. 😔
Your table is beautiful! What kind of wood did you use?
Thank you! I used pine. 🙂
love this! i think we might use this same plan, but i wanted to ask you about the ends. a friend who has built tables before warned me to not have the pieces that connect the two legs on each end because, if i want to put chairs on the end, people cannot scoot up to the table comfortably enough due to those pieces being in the way. do you have chairs yet, and, if so, what has been your experience with people sitting at the end of the table?
Your friend is right. The end is kind of a pain, I guess. I definitely can’t scoot the end chairs completely under the table. But I don’t think it’s uncomfortable to sit there. The table top sticks out far enough that it doesn’t make it uncomfortable to eat there.
There are plans on Ana White’s page for extensions on each end. We made this table 3 years ago. Total length with extensions is 12’6″. We seated 13 people last holiday season. 5 kids on the bench side, 2 on each end, and 4 adults on the chair side. You can even make shorty benches for the ends that will fit right under the extensions.
That’s beautiful! Did you do anything to prevent the wood from warping? Where did you get the wood to build this table. I tried making something one time and te wood warped so bad I haven’t tried to build anything since.
I got my wood from Lowe’s and I never had any issue with warping. I just put wood conditioned on it, stained it and put poly on top. But I don’t think it would have warped. Not sure why your wood would have warped??
Did you use pressure treated wood for the legs? I am looking for the 4×4’s in non pressure treated and people look at me as if I asked to buy a screen door for a submarine.
Hahaha!! I did use pressure-treated 4×4’s, but if I did it over again, I would want to use non pressure-treated. I’ve heard they so exist, so keep on asking! I hope you find some soon!
Pressure treated wood is strictly for outdoor use. Those chemicals could “gas off” indoors and make you sick. I recommend getting those posts out of your house and replace them with untreated. Even if you join two 2x4s together and use as legs.
Thanks so much for linking to Make the Scene Monday @ Alderberry Hill. You are being featured tonight!
I hope you are having a wonderful weekend, and join me tomorrow evening for Make the Scene Monday #78!
Hi, Laura! I just found a trackback to your post from my analytics and wanted to stop in and say hi! your table is beautiful. Wow — you did a great job getting the top totally flat. I’m super impressed. SO, I figured out long after I wrote my post that I didn’t mix my stain well enough. The closer I got to the bottom of the can, the more gray the stain became. Duh…I only shook it, didn’t stir. It was a happy accident, I guess, because I was a lot more impressed with the stain as it was on the top of the can than what I found as I got closer to the bottom. Live and learn!
How many people did this table seat?
It can seat 10 people.
Love this! We just got one from a friend but if not my husband would be making one! 😉 Thanks for sharing!
This is so awesome!!! I can’t wait to show my BF and get him to work on this. 🙂
I love it too!
Beautiful!
Thanks for sharing!
Stacey of Embracing Change
Your farmhouse table turned out beautifully! You should be proud of yourself!
Thank you! I’m very proud and happy to finally have a dining room table!
Wow! This looks amazing… fabulous job! (thanks for sharing at Project Inspire{d} this week, too!)
It turned out fantastic! Thanx so much for sharing at THT!
I think it turned out to be absolutely incredible!! Great job!
Krista @thehappyhousie
Thanks so much, Krista!
I’ve always wanted a farmhouse table, with benches! This is so fun 🙂
Thank you and welcome!!
This is GORGEOUS! You did a great job! Totally looks professional.
Thanks so much!!
Great job, it looks wonderful! Just bought and used the weathered oak last weekend on a project. I was also surprised how gray it looked. It did warm up a bit on the piece though. Enjoy that table!
Sooo much more gray than I thought it would be. But I love it!
it looks so gorgeous. we built our kitchen farmhouse table but didn’t use the kreg; i totally will on our next project
Oh, the kreg is the way to go. You’ll love it!
Oh my goodness! That table is amazing. You did an awesome job. I love it. Now, will you come on over and make me one 😉
Love your new table!!! I’ve always been into farmhouse tables, they’re just full of character!
Selene @ Restoration Beauty
Gorgeous table and your floors are amazing as well!!! Found you at Nifty Thrifty Tuesday.
I love it! Great job!
this is so beautiful! so, did you use the power tools yourself? i’m dying to try using a power saw but i’m scared! i love ana white’s site, too, and there are so many things i want to make. your table is so so beautiful. you could sell it (but you shouldn’t because it looks perfect in your house)! maybe make another and sell that one 😉
I used all of the tools myself. My hubby only helped me move it because its quite heavy. You can do the power tools!! They are not difficult at all, just go for it!! You’ll feel so empowered.
Stopping by from DIY Home Sweet Home-I’m your More the Merrier neighbor! This is a GREAT table, I love farmhouse tables!! Yours looks amazing, and I love that you make it look totally doable! Cute site as well 😉 Pinned this for future reference.
I love your table. I want one so bad. Gotta get the hubby to get busy.
Found you at Keeping it Simpler.
Beautiful table, Pinning! I’m visiting from Think Pink Sunday Linky Party.
Maria
Krafty Cards etc.
inspiring! it looks awesome, and i can imagine how fulfilling it must feel to have made it yourself.
popping over via miss mustard seed and hope you’ll stop by when you have a moment.
smiles to you and happy weekend.
michele
Thanks Michele … your blog is “lovely” .. 🙂
Wow, Laura!!! That is seriously impressive. GREAT job!!!! I can’t wait to see it all “dressed” for Christmas dinner! Do you have dining room chairs?
No chairs yet … I’m still on the hunt for the perfect ones!
I’m seriously impressed. I would have NO CLUE how to go about building something like this. It looks so awesome!!!
Thanks! 🙂